
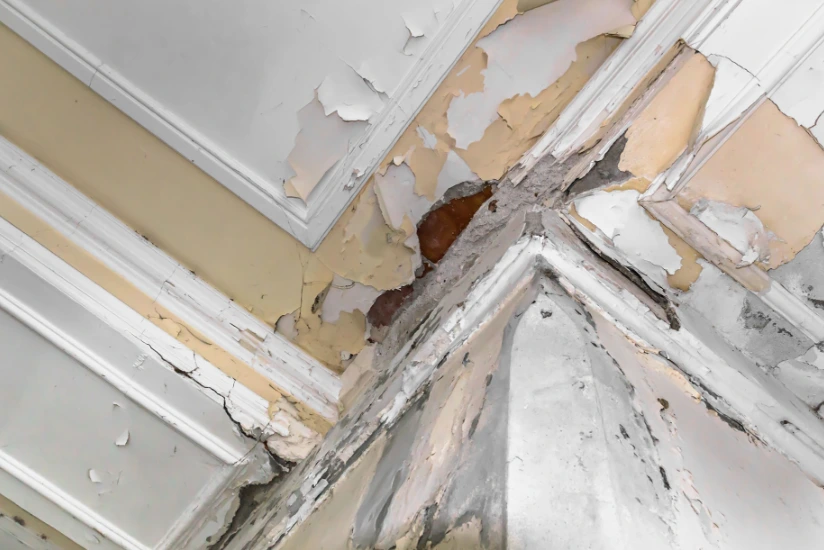
A water stain on the ceiling may look like a minor household problem, but it can indicate a leak or moisture issue that needs attention. Ceiling water damage can result from leaking pipes, roof problems, overflowing air conditioning systems, bathroom leaks, or storm-related water intrusion. If the source is not identified and repaired, moisture can spread into drywall, insulation, ceiling materials, and nearby walls.
For homeowners in Florida, ceiling leaks deserve particular attention because heavy rainfall, humidity, plumbing issues, and frequent air conditioning use can contribute to moisture problems. Even after the visible water disappears, moisture may remain inside the ceiling and create conditions for mold growth.
Understanding the common causes of ceiling water damage can help you identify the problem early and determine the right repair approach. Quality Restoration Services Inc. helps property owners address water damage through appropriate mitigation and restoration services.
What Does Ceiling Water Damage Look Like?
Ceiling water damage does not always begin with dripping water. In many cases, the first signs are small changes in the ceiling’s appearance or condition. Recognizing these warning signs early can help prevent more extensive damage.
Common signs include:
- Brown or yellow stains: Discolored patches may indicate water has entered the ceiling material and left visible marks as it dries.
- Peeling or bubbling paint: Moisture trapped beneath paint can cause the surface to bubble, blister, or separate.
- Sagging drywall: Water absorption can make ceiling drywall heavier and weaker, causing it to bend or sag.
- Cracked or damaged plaster: Continued exposure to moisture can weaken plaster and cause cracks or surface deterioration.
- Dripping water: Active dripping usually indicates an ongoing leak that needs immediate attention.
- Musty odors: A persistent damp smell may suggest hidden moisture or possible mold growth above the ceiling.
- Visible mold spots: Dark or discolored patches may indicate mold growth on a damp ceiling surface.
A stain does not always reveal the exact location of a leak. Water can travel along pipes, framing, insulation, and other building materials before becoming visible. Finding the original source is essential before completing repairs.
9 Common Causes of Ceiling Water Damage
Ceiling water damage can develop for several reasons. Identifying the source helps determine whether the problem requires plumbing repairs, roof maintenance, HVAC attention, or professional water damage restoration.
1. Leaking Roofs and Damaged Shingles
Roof leaks are a common cause of ceiling water damage, especially after heavy rainfall or storms. Damaged shingles, deteriorated flashing, loose roofing materials, and worn roof penetrations can allow rainwater to enter the building.
Once water gets beneath the roofing system, it may travel through the roof deck and insulation before reaching the ceiling. Homeowners may notice brown stains, peeling paint, or dripping water after a storm.
How to fix it:
Start by identifying where the water is entering the roof. Damaged shingles, flashing, roof vents, and other vulnerable areas may need repair or replacement. Any wet insulation or ceiling materials should also be evaluated.
If the ceiling has absorbed significant moisture, professional water extraction and structural drying may be necessary before replacing drywall or repainting.
2. Leaking Plumbing Pipes
Plumbing pipes running through ceilings, walls, and floors can develop leaks because of corrosion, loose connections, damaged fittings, or pipe failures. A small leak may remain hidden for weeks before water stains appear on the ceiling below.
This problem commonly occurs beneath bathrooms, kitchens, and other areas containing plumbing fixtures.
How to fix it:
The first step is to locate the leaking pipe or connection and stop the water supply when appropriate. A qualified plumber can repair or replace the damaged section.
After the plumbing problem is resolved, the affected ceiling should be inspected for trapped moisture. Wet drywall and insulation may require removal, followed by proper drying and replacement.
Simply painting over the water stain will not solve the underlying problem if the pipe continues to leak.
3. Bathroom Leaks From Upstairs
A bathroom located above another room can cause ceiling water damage when water escapes from a shower, bathtub, toilet, sink, or plumbing connection.
Damaged shower seals, deteriorated grout, leaking drain assemblies, and faulty toilet seals can allow water to move beneath the bathroom floor. It may eventually appear as a stain or dripping water on the ceiling below.
How to fix it:
Inspect the bathroom fixtures and plumbing to identify the source. Depending on the problem, repairs may involve replacing worn seals, fixing plumbing connections, repairing shower components, or addressing damaged waterproofing.
Once the leak has been repaired, the ceiling below should be checked for moisture. Any damaged drywall or insulation should be addressed before finishing the surface.
4. Air Conditioning Condensate Drain Problems
Air conditioning systems remove moisture from indoor air during normal operation. That moisture collects as condensation and should drain safely through the condensate drain line.
When the drain line becomes clogged with dirt, algae, or debris, water may back up and overflow from the drain pan. If the air conditioning equipment is installed in an attic or above a ceiling, the overflow can cause ceiling stains, dripping, and drywall damage.
This issue is particularly relevant in Florida, where air conditioning systems operate frequently because of warm and humid weather.
How to fix it:
Have the condensate drain line, drain pan, and related components inspected. A qualified HVAC technician can clear blockages, repair damaged components, and check whether the system is draining correctly.
If water has already entered the ceiling, the affected materials may need professional drying and repair. Replacing a damaged ceiling without correcting the drainage problem can allow the damage to return.
5. Overflowing or Leaking Air Conditioning Drain Pans
An air conditioning drain pan collects condensation when the system operates. If the pan becomes cracked, rusted, incorrectly positioned, or unable to handle the drainage, water can escape into the surrounding area.
An overflowing secondary drain pan may also indicate a problem with the primary drainage system.
How to fix it:
The drain pan and drainage system should be inspected to determine why water is escaping. Depending on the condition, the pan may need cleaning, adjustment, or replacement.
Homeowners should not ignore repeated water around an indoor HVAC unit. Continued leakage can damage ceiling materials, insulation, and nearby building components.
6. Damaged Roof Flashing and Roof Vents
Roof flashing protects areas where the roof meets walls, chimneys, skylights, vents, and other structures. When flashing becomes loose, cracked, or deteriorated, rainwater can enter through these openings.
Roof vents can also become a source of leaks when their seals or surrounding roofing materials are damaged.
How to fix it:
A roofing professional should inspect the flashing, seals, and roof penetrations to locate the entry point. Damaged flashing or surrounding materials may need repair or replacement.
After the roof leak is corrected, the ceiling should be checked for water damage. Any wet insulation or drywall should be properly addressed before repainting or refinishing.
7. Clogged Gutters and Downspouts
Gutters and downspouts direct rainwater away from the roof and foundation. When they become blocked by leaves, dirt, or debris, water may overflow and collect near roof edges.
Depending on the roof design and condition, overflowing water can enter behind fascia boards, damage roof edges, or contribute to leaks that eventually affect interior ceilings.
How to fix it:
Clean the gutters and downspouts regularly and check that water flows away from the property. Damaged gutter sections, loose connections, and improper drainage should be repaired.
If water has already entered the ceiling, identify and correct the source before beginning interior repairs.
8. Storm Damage and Heavy Rainfall
Florida properties can experience heavy rainfall, strong winds, and severe storms. These weather conditions may damage roofing materials, loosen flashing, break roof components, or force water through vulnerable openings.
In more serious situations, storm-related flooding can affect multiple areas of a building, including ceilings, walls, and insulation.
How to fix it:
Once the property is safe to enter, inspect for visible roof damage and signs of water intrusion. Arrange necessary roof repairs and document the damage for insurance purposes.
If the ceiling is wet or water has entered the building, professional water damage mitigation may be needed. This can include water removal, moisture assessment, structural drying, and removal of materials that cannot be restored.
Never climb onto a wet or storm-damaged roof to investigate a leak.
9. Condensation and Poor Ventilation
Not every ceiling moisture problem comes from a plumbing or roof leak. Poor ventilation and temperature differences can cause condensation to form on surfaces or within ceiling assemblies.
Bathrooms, kitchens, laundry rooms, and other areas with high moisture levels may be especially vulnerable when ventilation is inadequate.
Over time, repeated condensation can contribute to peeling paint, discoloration, damp materials, and mold growth.
How to fix it:
Improve ventilation by using appropriate exhaust fans, maintaining HVAC systems, and addressing areas where humid air becomes trapped. Bathrooms and kitchens should have suitable ventilation to remove excess moisture.
If moisture has accumulated inside the ceiling, the affected materials should be inspected and dried. Repainting without correcting the humidity or ventilation problem may only provide a temporary improvement.
What Should You Do When You Notice Water Damage on Your Ceiling?
Taking the right steps after discovering a ceiling leak can help limit further damage and reduce safety risks.
1. Protect People and Move Belongings
Move furniture, electronics, rugs, and other belongings away from the affected area if it is safe. Place a container beneath an active drip to collect water, but do not stand under a sagging or unstable ceiling.
2. Turn Off Electricity if Necessary
Water near ceiling lights, electrical outlets, fans, or wiring can create a serious electrical hazard. If you suspect water has reached electrical components, keep away from the area and have the affected circuit shut off by a qualified professional. Do not touch wet switches or fixtures.
3. Stop the Source of Water
If the leak is coming from plumbing, turn off the relevant water supply when it is safe to do so. For roof or storm leaks, arrange a professional inspection and temporary protection where appropriate.
Do not attempt repairs that require climbing onto an unsafe roof or entering a flooded area.
4. Document the Damage
Take photographs and videos of visible stains, dripping water, damaged belongings, and affected rooms when it is safe. This documentation may help when discussing the damage with your insurance provider.
5. Arrange a Professional Assessment
A visible ceiling stain may represent a larger hidden moisture problem. A restoration professional can assess the affected area, identify moisture in building materials, and recommend appropriate mitigation and repair work.
6. Dry and Repair the Affected Area
Water removal and structural drying should be completed before replacing damaged drywall, insulation, or other materials. Once the area is dry and the source has been corrected, repairs and finishing work can begin.
How Is Ceiling Water Damage Repaired?
The repair process depends on the cause, severity, and materials affected. A small surface stain may require limited repairs, while extensive water intrusion may require removal and replacement of ceiling sections.
Step 1: Identify and Repair the Source
Before repairing the ceiling, the original leak must be identified and corrected. This may involve plumbing repairs, roof work, HVAC drainage repairs, or improvements to ventilation.
Without fixing the source, water damage can return even after the ceiling has been repainted.
Step 2: Inspect the Affected Materials
The ceiling, insulation, nearby walls, and surrounding areas should be evaluated for moisture. Moisture can spread beyond the visible stain, so the inspection should consider areas around and above the damaged section.
Step 3: Remove Standing Water and Damaged Materials
If water has accumulated above the ceiling, it may need to be removed safely. Saturated drywall, insulation, or other materials that cannot be restored may need controlled removal.
The amount of demolition depends on the condition of the materials and the extent of contamination.
Step 4: Complete Structural Drying
Professional drying equipment, such as air movers and dehumidifiers, can help remove moisture from affected areas. Moisture readings may be used to monitor drying progress and determine when materials are ready for the next stage.
Drying time varies based on the amount of water, building materials, humidity, and ventilation.
Step 5: Address Mold When Necessary
If mold growth is present, the affected area may require an appropriate mold assessment and remediation process. The work should address the moisture source as well as the affected materials.
Covering visible mold with paint does not remove the underlying problem.
Step 6: Replace and Finish the Ceiling
After the area is properly dried and cleared for reconstruction, damaged drywall and insulation can be replaced as needed. The ceiling may then be taped, finished, primed, and painted to match the surrounding surface.
Can a Water-Damaged Ceiling Be Repaired Without Replacing It?
In some situations, a ceiling can be repaired without replacing the entire section. If the water exposure was limited, the leak was corrected promptly, and the drywall remains structurally sound, cleaning, drying, stain treatment, and repainting may be sufficient.
However, replacement may be necessary when drywall is soft, sagging, crumbling, or heavily saturated. Insulation that has absorbed contaminated water may also need removal.
A professional assessment can help determine whether the ceiling can be restored or whether damaged materials need to be replaced. Painting over wet drywall or covering a damaged area without proper drying can lead to recurring stains and other problems.
How Much Does It Cost to Repair Ceiling Water Damage?
The cost of repairing ceiling water damage depends on the source of the leak, the affected area, the materials involved, and the amount of restoration required.
A small ceiling stain caused by a repaired plumbing leak may involve relatively limited work. More extensive damage may require water extraction, structural drying, drywall removal, insulation replacement, and repainting.
The main factors affecting repair costs include:
- Size of the damaged ceiling: Larger affected areas generally require more labor and materials.
- Source of the leak: Plumbing repairs, roof repairs, and HVAC drainage problems have different costs.
- Water contamination: Sewage or contaminated floodwater requires additional safety and cleanup procedures.
- Drying requirements: Extensive moisture may require additional equipment and monitoring.
- Material replacement: Damaged drywall, insulation, paint, and ceiling finishes can increase the total expense.
- Mold remediation: Existing mold contamination may require additional assessment and remediation.
There is no single price that applies to every ceiling water damage project. The best way to understand the expected expense is to have the affected area inspected and obtain an estimate based on the actual restoration requirements.
How Can You Prevent Ceiling Water Damage?
Regular maintenance can help homeowners identify potential problems before they cause extensive damage.
Inspect your roof periodically: Look for missing or damaged shingles, deteriorated flashing, and other signs of roof wear, especially after severe weather.
Maintain plumbing systems: Check exposed pipes, bathroom fixtures, water connections, and appliance hoses for leaks or corrosion.
Service your air conditioning system: Keep condensate drain lines and drain pans in proper working condition. Routine HVAC maintenance can help identify drainage problems before they cause ceiling damage.
Clean gutters and downspouts: Remove leaves and debris so rainwater can drain away from the roof and property.
Use bathroom exhaust fans: Proper ventilation helps remove excess moisture produced by showers and baths.
Check ceilings for early warning signs: Investigate new stains, peeling paint, musty odors, and unusual ceiling discoloration rather than waiting for visible dripping.
Address small leaks promptly: Minor leaks can become more expensive when water spreads into insulation, drywall, flooring, and other materials.
When Should You Call a Water Damage Restoration Professional?
Some ceiling problems require more than basic patching or repainting. Professional water damage restoration may be necessary when:
- Water is actively dripping through the ceiling.
- The ceiling is sagging, bulging, or visibly unstable.
- Water has spread into multiple rooms.
- Drywall or insulation has become saturated.
- A persistent musty odor suggests hidden moisture.
- Mold growth is visible or suspected.
- The damage involves sewage, stormwater, or another contaminated source.
- The original leak has been repaired, but moisture remains.
If the ceiling is bulging or sagging, keep people away from the area. Do not puncture or attempt to remove the damaged section yourself. A water-loaded ceiling can collapse unexpectedly.
Water Damage Restoration Services From Quality Restoration Services Inc.
Ceiling water damage can affect more than the visible surface. Moisture may spread into insulation, framing, walls, and nearby rooms, making it important to identify the source and address the affected materials properly.
Quality Restoration Services Inc. provides water damage mitigation and restoration services for property owners in Port Charlotte and nearby Southwest Florida communities. The restoration process may involve assessing affected areas, removing water, drying building materials, and determining what repairs are needed.
Whether your ceiling damage comes from a plumbing leak, roof problem, air conditioning overflow, or storm-related water intrusion, addressing the issue promptly can help prevent additional damage.
If you notice ceiling stains, dripping water, or signs of hidden moisture, contact Quality Restoration Services Inc. to discuss your water damage concerns and restoration needs.
Frequently Asked Questions
What is the most common cause of ceiling water damage?
Common causes include leaking roofs, damaged plumbing pipes, upstairs bathroom leaks, clogged air conditioning condensate drains, and storm-related water intrusion. The source depends on the building’s layout and the location of the damaged ceiling.
Why is my ceiling leaking when it rains?
A ceiling leak during rainfall often indicates a roof-related problem. Damaged shingles, loose flashing, roof vents, skylights, or other roof openings may allow rainwater to enter. A roofing professional can inspect the roof and identify the entry point.
Can an air conditioner cause ceiling water damage?
Yes. A clogged condensate drain line, overflowing drain pan, or damaged drainage component can allow condensation water to escape. If the HVAC system is located above the ceiling, the water may cause stains, dripping, and drywall damage.
Is a ceiling water stain dangerous?
A water stain does not automatically mean the ceiling is unsafe, but it should not be ignored. The stain may indicate an active leak, hidden moisture, or weakened drywall. Bulging, sagging, or dripping ceilings should be treated as potential safety hazards.
How long does it take for mold to grow after ceiling water damage?
Mold can begin developing within approximately 24–48 hours when moisture and suitable environmental conditions are present. Florida’s humidity can make moisture management especially important. Prompt drying helps reduce the opportunity for mold growth.
Should I paint over a ceiling water stain?
You should not paint over a water stain until the source of the leak has been repaired and the affected material has been properly dried. If the drywall is damaged or mold is present, additional treatment or replacement may be necessary.
Can water-damaged ceiling drywall be saved?
Sometimes. Drywall exposed to a small amount of clean water may be restorable if it remains structurally sound and can be dried properly. Saturated, sagging, crumbling, or contaminated drywall generally requires removal and replacement.
Does homeowners insurance cover ceiling water damage?
Coverage depends on the cause of the damage and the terms of the homeowner’s policy. Sudden and accidental plumbing leaks may be covered, while gradual leaks, maintenance problems, and flood-related damage may have different coverage requirements. Contact your insurance provider to confirm your policy details.
Get Help With Ceiling Water Damage in Southwest Florida
A ceiling water stain can be an early warning of a larger moisture problem. Identifying the source, correcting the leak, and properly drying affected materials are important steps toward restoring your property.
Quality Restoration Services Inc. helps homeowners and property owners in Port Charlotte and nearby Southwest Florida communities with water damage mitigation and restoration. Contact the team to discuss your situation and determine the next steps for addressing ceiling water damage.